Friday, October 19, 2007

The Optimus Prime Costume: Halloween 2007

I'm finally done. 6 weeks, $180 (CDN), and about 3000 swear words later, I give you:

Optimus Prime

(Click on the pics for full size versions)


Thanks to everyone who read along, everyone who commented, everyone who put up with me babbling on and on about this, and especially Lindsay for putting up with me doing this for 6 weeks and not dumping me; and especially for helping me put the #*$&#*$&#& thing on. (About 6 minutes for those who are wondering.)

Thursday, October 18, 2007

Hittin the Head (Ewww...)

With the last drops of blue spray paint, the head is done. It didn't turn out as well as I would've liked but it's done. I'm done.

Milo (my cat) inspected the head thoroughly...


... and gave it her bite of approval. (Followed by subsequent shooing from me.)


Here's lookin at you, Prime.


Tomorrow I'll post pics of a full dress rehearsal. Hope I don't break anything ;)

Wednesday, October 17, 2007

Touch Ups And Total Progress

This update tastes like happy. There's something special at the end of today's post. (You'll see.) I started last night by finishing off the head. Namely, the face and "ears". I closed in the front of the face a little bit using some rectangular boxes cut to fit around the cardboard. The special cuts are more visible in the final helmet pic below.


The "ears" ended up being made up of a circular piece bevelled on one side, and an octagon with a giant section for the antenna.


I glued them on...


... and was realized the head, though large, was finally looking like Optimus Prime. The head basically sits on the body, mine doesn't fill it in the least. I'm debating, time and materials permitting, creating a new one. If this is the case, I'll put steps/pictures in here.


I had a few housekeeping details on the torso, namely adding the grey lines under Optimus Prime's windows. For these I simply used two blocks of styrofoam and painted them grey.


I also completed the other shoulder!


... and now for the total progress part. Because my workspace is getting extremely limited (this is a big costume, like I said before I've been working on a balcony), I brought some of the pieces inside and stacked them behind the dining room table... much to my girlfriend's chagrin. She's being a good sport about it. (She bought me a re-release of the original SoundWave a few days ago, how cool is that!)


Pretty. Next I laid everything out on the floor. Aaaaawe yeah!


Tomorrow! The helmet should be painted in all it's giant glory ("Pumpkin Head Optimus Prime"?), so stay tuned!

Tuesday, October 16, 2007

This Optimus Prime Costume Is Stacked (Well, Half Stacked)

I've been thinking about the stacks... PVC glue just wasn't working as it's not really made for contact joins. (You're supposed to slather a smaller pipe with it and fit it inside of a larger one.) I figured I could use the zip ties without taking too much away from the costume. It'd also prevent accidental breakage.

I prepped the pipe yesterday by giving it a coat of silver spraypaint. Because PVC doesn't dissolve like styrofoam, I was able to use regular spraypaint. So far as I know, Krylon doesn't make H2O Silver.


Next I drilled two small holes in the side of the larger pipe that would be facing the body and fed the zip ties through. It was easier than I thought, but only because I had the foresight to not connect the longer pipe first. (Unless you've got foot long fingers, you're never feeding the zip tie through the second hole.)


Next, I drilled three holes in each, the longer pipe and the shorter pipe, that were equal distance away from each other. These holes would house the zip ties that hold the two together. I fed the ties through and put them on loosely as I went. If I had done them up all the way, each succeeding one would've been a total pain to put in.


It looked like the stack would hold together really well, despite being a bit ugly now. I drilled two sets of holes in the shoulder (the part that would be facing away from the torso) and fed the ties through.


For added strength (read: think of a smokestack getting ripped off of thin flimsy styrofoam) I put a dowel under the zip ties. If anything caught on the stack, they'd have to rip the dowel through now as well.


Finally, I cut out an Autobot symbol I had printed up and glued it onto the arm. There had to be SOME glue in this step, heh!!!


Lookin good!

Monday, October 15, 2007

Housekeeping!

The really boring part about making an Optimus Prime costume like this has to be that you need to make two of almost everything. Today's post (unfortunately) is just housekeeping.

I made another foot:


... and the other leg:


... and some wheels to go with it:


Tomorrow I'm going to try to finish off the helmet and at least one smokestack.

Sunday, October 14, 2007

Well Met, Mr. Helmet

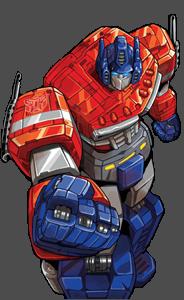
The moment I've been dreading has finally hit me head on. The helmet. The head. The face. No matter how you want to put it, this is going to be a pain. Well. May as well get into it!

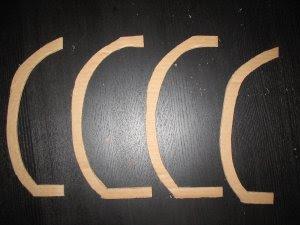
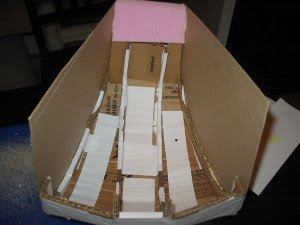
I started by cutting out some cardboard 'ribs', two large and two smaller. The two larger ribs will support the ridge on top of Optimus Prime's head, the smaller two will be for the sides of the head. (This will make sense later.)


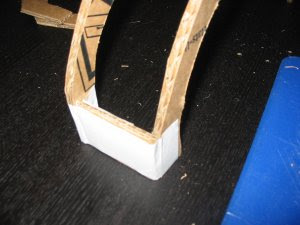
Next I took a small rectangle of cardboard and used it as a spacer / support for the two larger ribs. I used sticker paper for to secure everything.


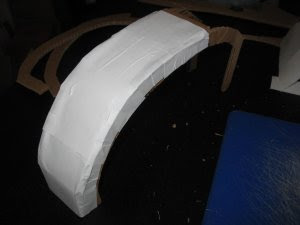
I continued doing this with little rectangles of cardboard until I had completely done the big ribs end to end:


With the center of the head built, it was time to do the sides. I started again with small rectangular pieces of cardboard and secured the ribs to either side of the completed section. I chose to do both at the same time so I could pay attention and make things symmetrical.


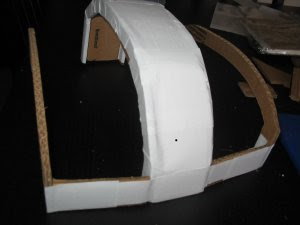
After that, same as before, I laid down little rectangles and secured them until I ended up with this:


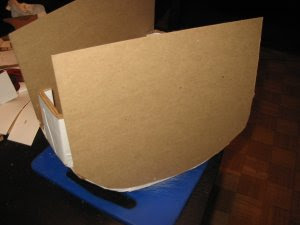
Here's the underside:


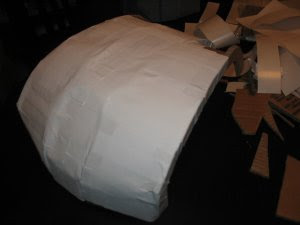
Next I traced the top helmet curve onto some cardboard (the non corrugated kind) and cut out two sides. I glued these onto the sides of the small ribs. These will form the side of the head.


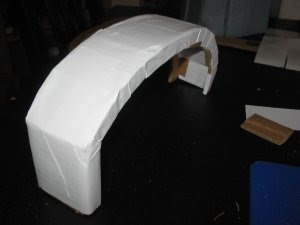
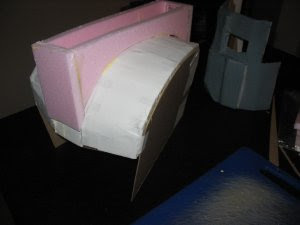
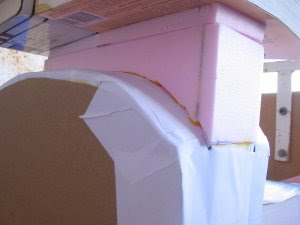
With the sides glued on, I needed to seal the back. I used a block of styrofoam. It's not as big as the back of Optimus Prime's head but it'll work. I also left a 1/4 inch gap for ventilation which I'm really gonna need. Also, now it's a styrofoam/cardboard COMPOSITE helmet. Doesn't that sound fantastic? Wow. Composite. ... ... what do I have to do to impress you people?


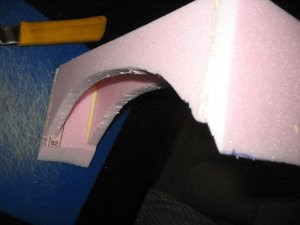
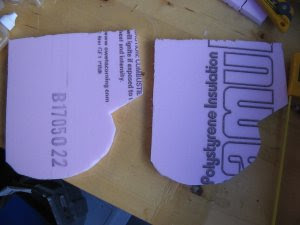
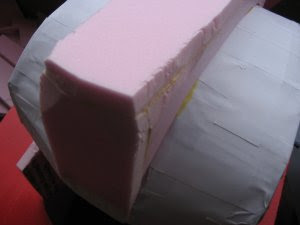
Next up was the head ridge. I cut two styrofoam rectangles and them slowly carved a rounded area out of each. The goal here was to match the head contour, which I did, after several hacks of the utility knife. Square end pieces were glued to the ends:


Next I glued the ridge to the center line of the helmet:


After this I cut out a large rectangle and glued the top of the ridge on.


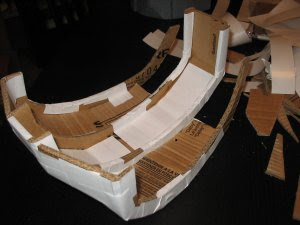
As cool as flat sides looked, I cut out what will be the base of Optimus Prime's ... ... uh... ears? The rounded things the antennas come out of. We'll go with 'ears' for now.


Aaaaand I glued them on.


I used a knife to round off the head ridge. There were a lot of gaps and a lot of glue seepage.


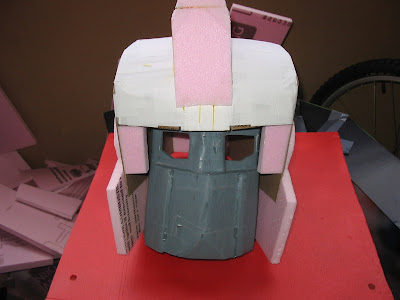
With the wind picking up to 50 bajillion miles per hour, I put in two rectangular pieces of styrofoam to help close the face off and called it quits.


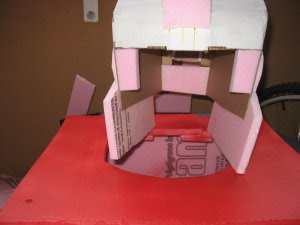
Here's a dry run with the face in the helmet.


It's going to be a long day, stay tuned for more updates!

Saturday, October 13, 2007

Rollin, Rollin, Rollin!

A lot of thoughts had crossed my mind for the wheels. Lawnmower wheels? Wagon wheels? (Note for American readers: Not the delicious snack food.) Wheels for some other kinda wheeled toy? All of these seemed to heavy. The lightest option would be to exclude them entirely. I really thought about that but if the Optimus Prime Costume has fenders, the guy needs wheels. In true spirit of this costume, rather than going with something overly expensive (that would actually look good), I decided to make them myself. I started with four 5x5 blocks of foam. I then rounded off the corners on one of them.


Realizing this wasn't too hard, and that it kinda looked like a wheel, I did the other three.


Next I glued the pieces together in pairs. Since I used leftover 1 inch thick foam, that gave me two wheels with a depth of 2 inches. Once the glue was dry, I bevelled the edge that would be facing outward.


Next the wheels got a coat of black spraypaint. (Again, the Krylon H2O stuff. Almost anything else will eat styrofoam.)


When the wheels were dry, I printed out a wheel rim pattern. I just guessed at the size, they came out at around 2.5 inches. So Optimus Prime has low profile tires. Ah well. I cut out the rims and glued them to the wheels. Are you ready for this? It actually looks alright. Seriously.